
CREATE WEBSITE FREE
To create a website of our own has become a lot easier. Even you can make your own website with little or no coding skills. There are plenty of domain name and hosting providers with cheap and reliable quality services to take a step forward once you know the basics of website design. Before investing in something we all want to be assured of ‘money well spent’. In this tutorial, you will learn how to create website free of cost of your own which means you get to have a free domain name and free web hosting. “OH YEAH”. For those of you who are not familiar with the term domain name and web hosting I will go with the basics, rest can skip. ! Let’s begin to create website free!
Domain name
What pops up in your head when you hear the word domain name in the context of web design? Most of you might have already guessed ‘it’s obviously my website name da!’. Well, you are right. In simple words, a domain name is the text-based representation of the numeric addresses (IP addresses) for our ease to memorise to represent computer networks and services. It might seem more sophisticated when you dig in as it involves hierarchical structure and protocols. For more information on Domain Name.
Web hosting
By now you should have decided the name for your website. Web hosting is similar to starting your business, first, you plan what you are selling and choose the name and put it to live. Likewise, once you choose the domain name, you want to make it available on the internet for which your website is needed to be hosted hence the term Web Hosting.
Apart from this to bring your website to life with the design and features of your choice you will need the content management system like WordPress, Drupal, Joomla and there are many others to be installed in your web host server. Among which WordPress is popular offering flexibility and ease which we will see in a later stage. Well, it’s not as difficult as it sounds with all the hard works done for you.
Without wasting your time any further let’s move on to the first step to build your own website for free.
Step 1
Register your free Domain Name
The first step to create website free of cost will be to choose and register your free website name. As far as I know, there are two best registrars providing free domain names NIC and Freenom. As there are some issues while parking your domain registered at NIC with a free hosting provider, I recommend you go with freenom as its easier and faster. Now one thing you should know is the popular top level domain like .com, .org, .net and others are not available for free. Those which are available are domain names like .cf, .tk, .ml and so on. Keeping the popularity aside even a free domain which is well optimized can rank higher in Google search.
- Visit Freenom
- Check for availability of the domain name of your choice.
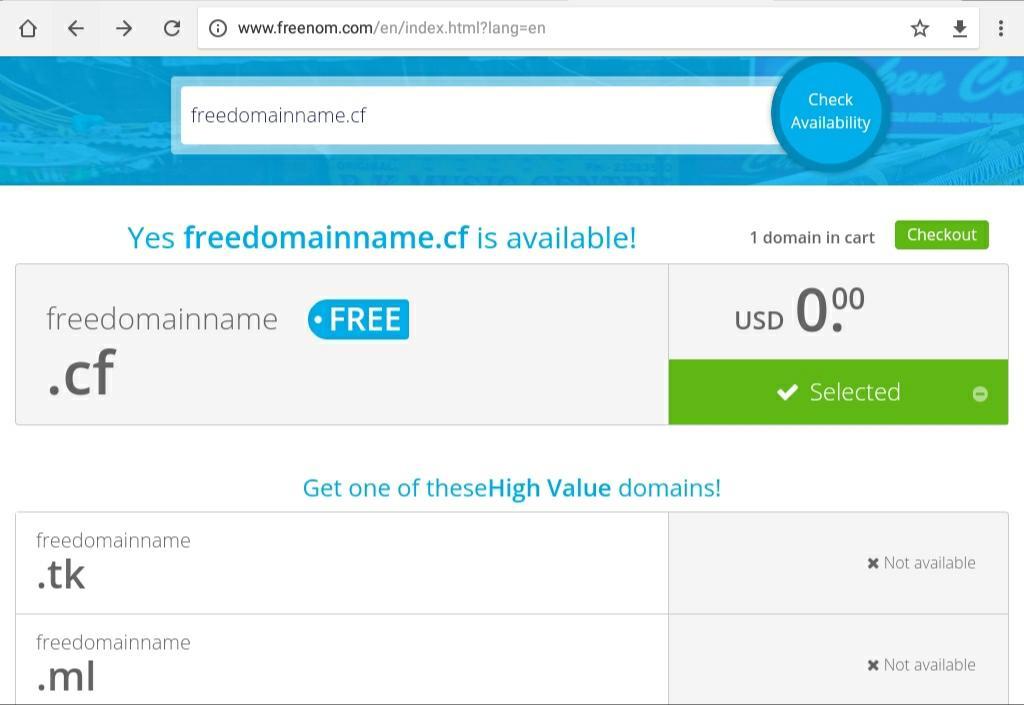
- Checkout and you would like to select the 12 months free plan then continue. You can renew for free after it expires.

- Register your account and domain name by verifying your email address and setting up your password and we are good to go hosting.
Note: Name servers is needed to be changed from registrar to the name servers of hosting provider which we will see in later stage.
step 2
Hosting your website: Go online with your Domain
You might be already familiar with the hosting providers as there are plenty of them out there. Most of them offer paid services with various price ranges like Hostgator, Bluehost, and others. You can even host by setting up your own server like Apache server which in practical needs more resource and investment. But to our concern, there are some providing both free and paid services like 000webhost, x10hosting, and others. Although its easier to setup with 000webhost which shows 000webhost branding on your website I recommend to go with x10hosting as you will have more freedom and options with Cpanel.
It is obvious that free services often have limits on a resource like you can park only one domain with disk space of 512 MB but its worth playing around to give a kick start. Now let’s go with x10hosting to make your website come to life.
Creating your account
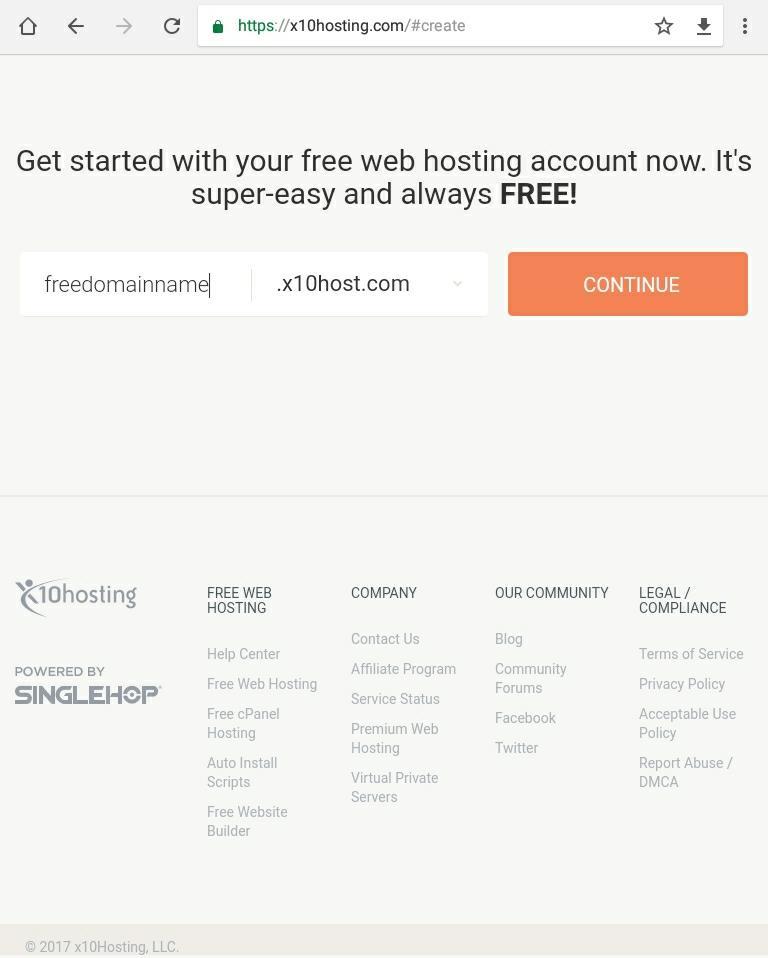
- Visit x10hosting
- Create a new account unless you already have one registered.


- You will be prompted with the option to choose your name with .x10host.com type any name you like and continue.
- Now, You will be asked for the email address. Set your email address and password and verify to complete creating your account.
Parking your Domain
Before you can park your domain nameserver most be pointed towards x10hosting.
Changing Nameservers
- Go back to your freenom account
- Go to services > my domains
- Select your website name and click on manage domain
- Now go to Management Tools > Nameservers.
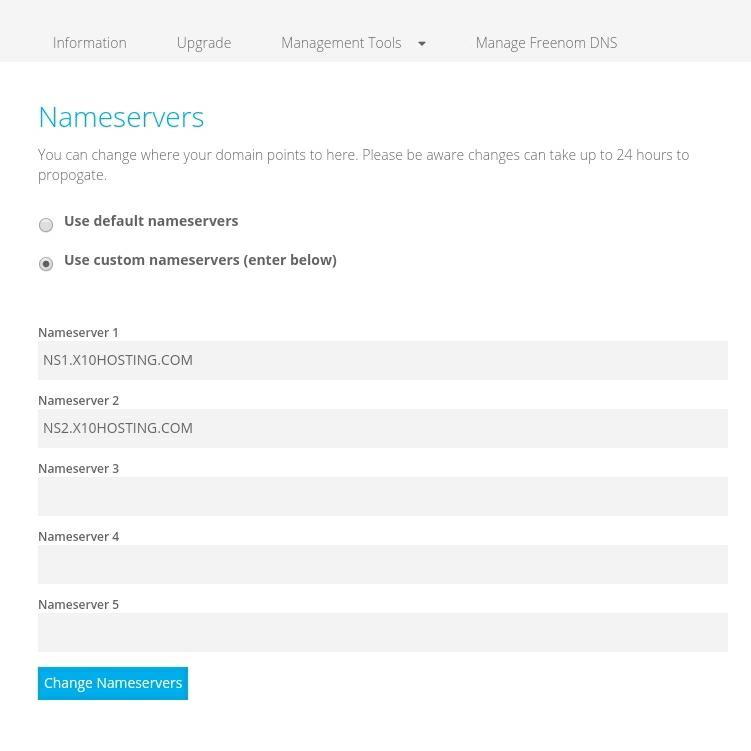
- From there click on use custom nameservers and enter the field as shown in the above image ( Nameserver 1 > ns1.x10hosting.com and Nameserver 2 > ns2.x10hosting.com).
- Then Save changes or Change Nameservers.
This way we are indicating our website or domain to be hosted on x10hosting as hosting provider.
Now switch back to x10hosting. Here you might be prompted with x10hosting interface once you sign in with your account. Lets change the theme to Cpanel interface for which option is available on the top right corner for our ease.

This is how your Cpanel looks like.
- Now go to the parked domain under Domains in Cpanel.
- You will be prompted with the screen as shown.
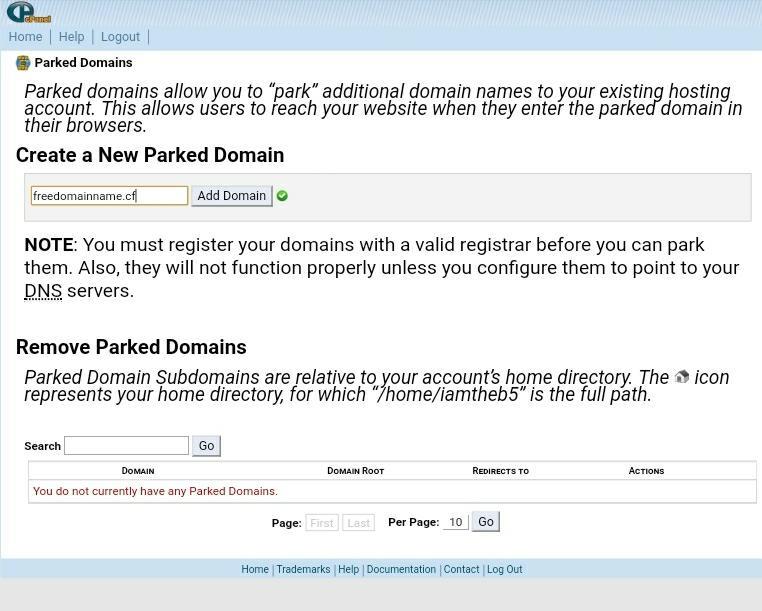
- Enter your domain name and click Add Domain.
- Congratulation now your domain is successfully parked.
As you can see you can only park one domain for the free plan but you have 2 sub-domains and addon domains. If you want to host other websites for free you have to repeat all the process above with different email address. Alternatively, you can use 000webhost which offers 2 parked domains. If you would like a tutorial on that comment and subscribe to our blog.
Next step is to install and manage content management system which shows what your website has to offer or simply your contents.
Step 3
Content Management System: Design and manage your website content
As WordPress is the easy to use than others along with popularity. Majority of the website today is based on WordPress. There are others also beautifully crafted like Drupal and Joomla. But you might find it harder than WordPress. WordPress offers thousands of free and paid themes and plugins. We will see how to install WordPress with one click install in Cpanel.
Installing WordPress in Cpanel
- Go to Softaculous App Installer. You will find WordPress script listed in the section.
- Click on WordPress > install. When prompted configuration page change to your domain name in choose Domain option, change your email if different and install.
- WordPress will be installed and you will able to manage your contents from the WordPress Dashboard by visiting Administrative URL: yourdomain/wp/wp-admin.
That’s all! you have just finished creating your free website. Now play around with Cpanel and WordPress to design and optimise your contents.